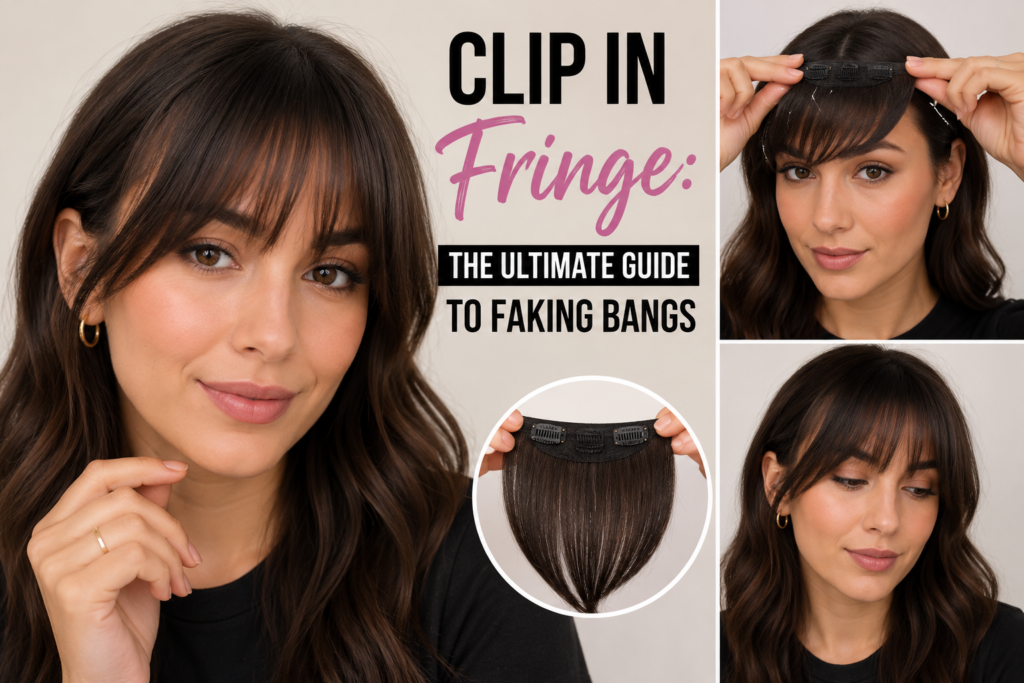
Clip In Fringe: The Ultimate Guide to Faking Bangs Without the Commitment
Ever wanted to try bangs but you’re just… terrified of the commitment? The scissors are scary. And what if you hate them? You’re stuck with months of that awkward grow-out phase. Most of us have done it — stood in front of the mirror, held our hair up, and thought… what if?
Here’s the thing: you could have that exact look in less than two minutes, with zero risk. That’s not a gimmick. That is the magic of the clip in fringe. This one simple accessory can totally transform your style and give you that drama and edge you’ve been craving — with none of the regret. If you’re fringe-curious, this guide covers everything from choosing the right one to blending it so naturally nobody will ever know.
What Is a Clip In Fringe?
A clip in fringe — also called clip-in bangs — is essentially a pre-cut hairpiece. It’s made from either real human hair or high-quality synthetic fibers, and it has a few small, pressure-sensitive clips that attach securely right into your own hair at the hairline.
The best part is just how quick and easy it is. The whole process — parting your hair, clipping it in, blending it out — takes less than two minutes once you get the hang of it. It’s the ultimate tool for style versatility. You can play around with all the latest bang trends, from soft curtain bangs to a bold, blunt fringe, without ever letting a pair of scissors near your head.
It’s perfect for a special event, a night out, or even just those days when your hair feels a bit blah and you want to shake things up. Best of all? It’s completely reversible. At the end of the day, you simply unclip it and you’re back to your natural hair. Zero commitment, zero awkward grow-out phase, and zero regrets.
How to Choose Your Perfect Clip In Fringe
Before starting your transformation, you’ve got to find the right fringe for you. Honestly, this is the most important step. Getting it right is the difference between a look that’s flawlessly natural and one that screams “fake.” There are three key things to think about: color, material, and style.
Color Matching — The Most Important Step
This is the number one thing that will make or break your look. The golden rule is to match the fringe to the mid-lengths and ends of your hair — not your roots. Roots are almost always a little darker, so matching to the ends, where the fringe will actually fall, is what gives you that seamless, natural blend.
Always check your hair in natural daylight to get a true read on its undertones. Is your hair warm, with golden or honey tones? Or is it cool, with ashy or platinum hues? A lot of brands now offer multi-tonal options with highlights and lowlights built in, which add dimension and look far more natural than one single, flat color.
If you’re buying online, use a color ring or check whether the brand offers a color-matching service — many will give you a professional recommendation if you send in a photo. And here’s a useful pro tip: if you’re stuck between two shades, always go for the slightly lighter one. A fringe that’s a tiny bit too light is so much easier to blend than one that’s too dark.
Human Hair vs. Synthetic — Which Is Worth It?
This choice comes down to your budget and how often you plan to wear it.
Synthetic clip-in fringes are more affordable, usually between $15 and $35. They’re low maintenance because they come pre-styled and hold their shape well. However, the drawbacks can be significant — they sometimes have an unnatural, plasticky shine and don’t move as freely as real hair. Crucially, most synthetic hair can’t be heat-styled because it can literally melt the fibers. There are heat-friendly synthetics available, but always check the label carefully for the temperature limit.
Human hair clip-in fringes are more of an investment, typically ranging from $40 to over $100 — but the difference is noticeable. You’re getting an accessory that looks and feels almost identical to your own hair. The best quality option is Remy human hair, where all the cuticles face the same direction. This prevents tangling and gives it that beautiful, natural shine. You can heat-style it, wash it, and in some cases have it professionally colored. If you plan to wear your fringe regularly and want the most realistic result, human hair is absolutely worth it — it lasts longer and gives you far more styling freedom.
Style and Face Shape — Finding What Flatters You
There are no hard and fast rules in fashion — wear whatever makes you feel amazing. That said, certain styles can be extra flattering depending on your face shape. As Harper’s Bazaar notes, understanding your face shape is one of the most useful tools for making smarter hair decisions.
For a rounder face, curtain bangs or a soft, side-swept style work beautifully. They create vertical lines that help elongate the face. For a square face, soft, wispy bangs can soften a stronger jawline. If you have a long or oval face, you’re in luck — you can pull off almost anything. A full, blunt bang looks incredibly chic, while wispy styles work just as well. For heart-shaped faces, side-swept or curtain bangs are fantastic for balancing a wider forehead.
How to Apply and Blend a Clip In Fringe Naturally
You’ve picked your perfect fringe — now for the fun part. Here’s a step-by-step breakdown of how to put it in and blend it so seamlessly that nobody will ever know it’s not your real hair.
Step 1: Prep and Backcomb
Start by brushing the front of your hair smooth. Then comes the secret trick that makes all the difference: a little backcombing. Take a fine-tooth comb and gently tease the small area of hair at your hairline, right where the clips will sit. This creates a firm cushion for the clips to grip onto, stops any sliding, and gives the fringe a natural lift at the root. For extra hold, add a light spritz of hairspray to that teased section.
Step 2: Create Your Section
Use a comb to create a small triangular part at your hairline, starting about two inches back from your forehead. Then clip the rest of your hair back and out of the way.
Step 3: Position and Clip
Pop the clips open by pressing on the sides. Line up the fringe with the part you just made — the center clip should sit right at the top point of your triangle section, and the side clips should land just above your temples. Press down firmly on each clip until you hear that satisfying little snap. Give it a gentle tug to confirm it’s secure. If it wiggles, simply unclip and re-snap until it feels locked in.
Step 4: The Blend — Where the Magic Happens
Release the rest of your hair and let it fall naturally over the top and sides of the fringe. Use your fingers or a comb to gently coax your own hair to blend in with the edges of the fringe. If the clip or base is visible, a small spritz of texturizing spray or dry shampoo at the roots will add grit and volume to hide it perfectly.
Step 5: Style Everything Together
This final step is what truly marries the hairpiece to your own hair. Use a flat iron or curling wand on a low to medium heat setting and style the clip-in bangs together with your own hair. Creating just a slight bend or wave across both the fringe and your face-framing layers makes everything look completely seamless.
Styling Looks You Can Create with a Clip In Fringe
The best part about a clip in fringe is how versatile it really is. You’re not just getting one new look — you’re unlocking a dozen. According to Vogue, bangs have consistently ranked among the most transformative hair changes a person can make, and clip-in versions make that transformation accessible to everyone.
Sleek and straight: For a timeless, chic Jane Birkin-inspired look, use a flat iron to get the fringe smooth and straight, letting it skim your eyebrows.
Curtain bangs: Still one of the strongest trends going. Use a round brush and blow dryer, or a large barrel curling iron, to sweep the sides of the fringe up and away from your face, creating that soft, face-framing ‘C’ shape.
Side-swept glam: For a night out, try a deep side part to create a dramatic side-swept bang. A flat iron with a slight outward flip at the ends adds a touch of retro glamour.
And of course, clip-in bangs work with literally any hairstyle. They look just as amazing with your hair down as they do with a high ponytail, a messy bun, or a half-up style — instantly adding something extra to whatever you’ve already got going on.
Pro Tips and Common Mistakes to Avoid
How to Care for Your Clip In Fringe
If you have a human hair fringe, you only need to wash it every 15 to 20 wears, or whenever product starts to build up. Over-washing can dry it out. Use a gentle, sulfate-free shampoo and always let it air-dry flat on a towel. For storage, keep it flat or on a small clip stand to help it hold its shape between wears.
Mistakes That Give It Away
Matching to your roots instead of your ends. This is the most common mistake and the one that most often makes a fringe look fake. Always match to your mid-lengths and ends.
Clipping too far forward on your forehead. Remember to start about two inches back — any further forward and it can look a little obvious.
Skipping the backcombing step. It seems small, but it’s the key to keeping the fringe secure and stopping it from sitting flat against your head.
Not blending properly. Taking that extra minute to really style your own hair over and into the fringe is the secret to making it look completely real. Blend, blend, blend — it’s the one step you should never rush.
FAQ Section
Q1: What is a clip in fringe?
A clip in fringe is a pre-cut hairpiece with small pressure-sensitive clips that attach to your natural hair at the hairline. It instantly creates the look of bangs without any cutting or commitment, and can be removed in seconds.
Q2: How long does it take to put in a clip in fringe?
Once you get the hang of it, the whole process — sectioning, clipping, and blending — takes less than two minutes. It’s one of the fastest hair transformations available.
Q3: Can you style a clip in fringe with heat?
It depends on the material. Human hair clip-in fringes can be heat-styled just like your own hair. Most synthetic options cannot be heat-styled, though some heat-friendly synthetics exist — always check the product label for the maximum temperature limit.
Q4: How do you match a clip in fringe to your hair color?
Always match to the mid-lengths and ends of your hair, not your roots. Check your hair in natural daylight to identify warm or cool undertones, and if you’re choosing between two shades, go slightly lighter — it’s far easier to blend than a shade that’s too dark.
Q5: How long does a clip in fringe last?
With proper care, a human hair clip in fringe can last a year or more. Synthetic versions typically last several months. Washing only when necessary and storing flat or on a clip stand will extend its life significantly.