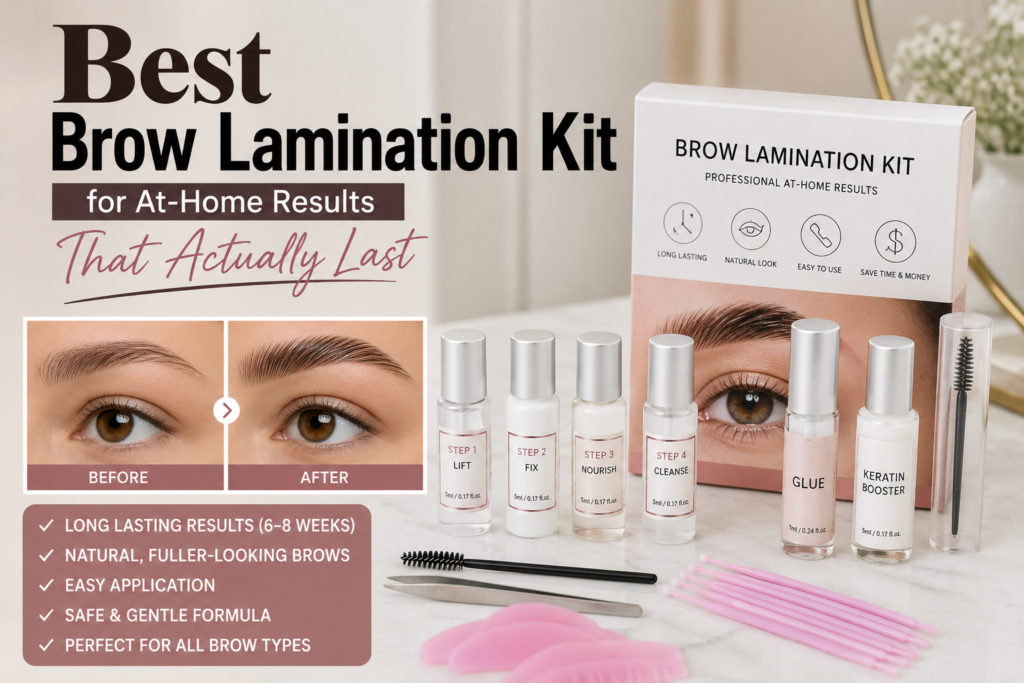
Best Brow Lamination Kit for At-Home Results That Actually Last
Walk into a salon, and an hour later you walk out with perfect, fluffy, supermodel brows that look effortlessly groomed. The only problem? Your wallet is anywhere from $60 to over $100 lighter — and you have to do it all over again in about six weeks. For years, that cycle meant paying hundreds of dollars a year just to have brows that behaved.
The good news is that the right brow lamination kit can give you those exact same results at home, for a fraction of the cost. After months of testing everything from viral TikTok budget kits to professional-grade options, here’s the definitive breakdown of what’s actually worth buying — and what to avoid completely.
What Is Brow Lamination — And What Can It Actually Do?
Think of brow lamination like a perm for your eyebrows. It’s a temporary chemical treatment that restructures the brow hairs, allowing you to brush them into a new, desired shape. It’s the secret behind making brows appear fuller and thicker by redirecting hairs that are already there to cover sparse spots.
It won’t magically fill in large gaps — you might still want a pencil or tint for that — but the difference is still significant. Results typically last between four and six weeks, though some kits can push up to eight weeks depending on the formula and your hair type. Before you run out and buy the first kit you see, though, there are some critical things worth knowing first.
The At-Home Brow Lamination Kit Buyer’s Checklist
Not all kits are created equal. In fact, some can be genuinely dangerous if you don’t know what to look for. Here’s a five-point checklist to use when shopping.
1. Safety and Ingredients — Non-Negotiable
This is the most important factor, full stop. A quality brow lamination kit will always tell you to do a patch test 24 to 48 hours before the full treatment. That step is non-negotiable. You’re putting strong chemicals — often a thioglycolic acid-based solution — near your eyes, and an allergic reaction in that area can be serious.
Also look for kits that include nourishing ingredients like keratin or conditioning oils. These are essential for keeping brow hairs healthy after the chemical process, which can be very drying. If a kit has a vague or incomplete ingredient list, it’s a hard pass.
2. Kit Completeness and Ease of Use
Does the kit include everything you need? A good one will come with the lifting lotion, the fixing lotion, a nourishing serum or oil, and all necessary tools like applicators and spoolies. Clear instructions are also a must. The best kits provide precise timing guidelines — but be aware that processing times vary widely, from 3 to 10 minutes depending on your hair thickness and the product’s strength.
Timing is the number one place where people go wrong. Leaving the solution on too long can fry your brows; not long enough and it simply won’t work.
3. Longevity of Results
You’re putting in the effort, so you want it to last. Most mid-range kits hold for four to six weeks. Budget kits typically fade after three to four weeks, while some premium options claim up to eight. Also check how many applications you get per kit — that feeds directly into the next point.
4. Value for Money
This is where at-home lamination really shines. A salon visit can easily cost over $75. A quality at-home brow lamination kit might cost $35 but give you five or six uses — that works out to less than $7 per treatment. Some popular kits offer up to 10 sessions for around $35, which is just $3.50 each. The math really does make a compelling case. As Byrdie has noted, at-home brow treatments have become one of the fastest-growing segments in the DIY beauty market precisely because the cost savings are so significant.
5. Brand Reputation
Look for brands with a track record in the beauty industry and plenty of verified user reviews. If a brand is already known for quality lash or brow products, that’s a strong sign they understand what they’re doing with formulas that go near your eyes.
Brow Lamination Kit Showdown — Budget vs. Mid-Range vs. Premium
Here’s how the three tiers actually compare after real testing.
Tier 1: Budget Kits ($15–$25)
These are the kits plastered all over Amazon and TikTok, often from brands you’ve never heard of. The pros are obvious — for around $20, you get everything you need to try the trend without a big financial commitment. For a total beginner who just wants to see if they even like the laminated look, this tier makes sense.
The cons, however, are significant. Instructions can be confusing or poorly translated, which is a serious red flag when dealing with chemicals near your eyes. The nourishing agents are often lower quality, and results tend to fade after just three to four weeks. These are fine for a one-off experiment, but if you plan on laminating your brows regularly, you’ll want to move up from this tier pretty quickly.
Tier 2: The Mid-Range Sweet Spot ($25–$50)
This is where the best balance of price, performance, and safety lives. Brands like Ardell, Miya Lash, and Nanobrow have a strong presence here. The Ardell Brow Lamination Kit — available at the drugstore for around $20 to $25 — is a standout example. It comes from a trusted brand, delivers reliable results, and includes clear instructions.
These kits typically include nourishing ingredients like keratin or conditioning oils, and results hold for a solid four to five weeks. Most provide enough product for three to six applications. The Ardell kit, for instance, offers up to three uses, making the cost per treatment genuinely low. For the vast majority of people, this tier is the clear winner — salon-quality results without the salon price tag, with ingredients you can feel more confident about.
Tier 3: Premium Kits and Styling Alternatives ($40–$60+)
This tier contains two very different types of products, and knowing the difference matters.
True premium chemical kits — from brands like Thuya or upper-tier Nanobrow — may offer results lasting up to six weeks or more and often market superior conditioning treatments. However, a higher price doesn’t always guarantee a gentler formula, so still check the ingredients carefully.
“Lamination effect” stylers are something else entirely — and they’re worth knowing about. The most well-known are the Anastasia Beverly Hills Brow Freeze and the NYX Professional Makeup Brow Glue. To be clear: these are not chemical lamination kits. They’re extreme-hold styling products. ABH’s Brow Freeze is a clear styling wax with a firm, gel-like texture that you apply with a spoolie to lift and set brows for the day — it gives you that feathery, laminated look, but washes off at night. The NYX Brow Glue is a super-strong clear gel that locks brows in place for up to 16 hours.
These products are fantastic for anyone who wants the look without the commitment or chemicals. If you have sensitive skin or are nervous about the perming process, a styling gel like Brow Freeze or the more affordable NYX Brow Glue gives you total daily control with zero risk. According to Glamour, brow styling gels have surged in popularity specifically because they deliver the laminated aesthetic without any of the chemical process concerns.
How to Actually Do Brow Lamination at Home
While you should always follow your specific kit’s instructions, the general process is universal and involves three main steps.
Step 1: Preparation and Lifting
Start with clean, dry brows, completely free of makeup or oils. Apply the lifting cream — the chemical solution that breaks down the bonds in your hair. Brush the hairs upward into your desired shape and let the solution process for the time specified in your kit, usually between 5 and 10 minutes.
Step 2: Fixing
After removing the lifting cream, apply the fixing lotion. This is what rebuilds the bonds in your hair, locking them into their new, lifted position. Leave it on for a similar amount of time, as directed by your kit.
Step 3: Nourishing
After removing the fixing lotion, apply the nourishing oil or keratin serum. This step is vital — it replenishes moisture and keeps your brow hairs healthy and strong after the chemical process. Do not skip it.
Aftercare — The Part That Makes or Breaks Your Results
Aftercare is arguably more important than the application itself. For the first 24 hours after treatment, keep your brows completely dry. No water, no sweating, no steam, and no makeup on or around the brow area. Getting them wet during this window can disrupt the setting process and ruin the results entirely.
After that initial period, keep your brows hydrated. Apply a conditioning brow serum or oil daily to prevent the hairs from becoming brittle. Think of it exactly like using conditioner after shampooing — it’s essential maintenance that protects your investment and keeps the results looking fresh for as long as possible.
So Which Brow Lamination Kit Should You Actually Buy?
Here’s the honest bottom line after all the testing.
If you’re a complete beginner who just wants to try the trend without spending much, a budget kit can be a starting point — but proceed with caution, do a patch test without exception, and read the instructions carefully before touching anything to your face.
For nearly everyone else, mid-range kits are the undeniable winner. A kit like the Ardell Brow Lamination delivers the best combination of safety, reliable results, and real value for money. You get the salon look for a fraction of the price.
And if you love the laminated look but are nervous about the chemical process or have sensitive skin, skip the perm entirely and reach for a high-hold styling gel. The NYX Brow Glue is an affordable and genuinely effective way to get that sleek, brushed-up style every single day — with zero commitment and zero chemicals.
The right brow lamination kit for you depends on your budget, your brow goals, and how much commitment you want. But now you have everything you need to make that call confidently.
FAQ Section
Q1: What is a brow lamination kit and how does it work?
A brow lamination kit is an at-home beauty treatment that chemically restructures your brow hairs, allowing them to be brushed into a new, lifted shape. It uses a lifting lotion to break down the hair bonds, a fixing lotion to reset them in the new position, and a nourishing serum to condition the hairs afterward. Results typically last four to six weeks.
Q2: Is at-home brow lamination safe?
It can be safe when done correctly. The most important step is always doing a patch test 24 to 48 hours before the full treatment to check for allergic reactions. Choose a kit with clear instructions, quality nourishing ingredients like keratin, and a reputable brand. Always follow the timing guidelines precisely — leaving the solution on too long is the most common cause of damaged brows.
Q3: How long does a brow lamination kit last?
Most mid-range brow lamination kits last four to six weeks. Budget kits may fade after three to four weeks, while some premium options advertise results of up to eight weeks. Results also depend on your hair type and how well you follow the aftercare instructions.
Q4: What is the best brow lamination kit for beginners?
For beginners, the Ardell Brow Lamination Kit is one of the most recommended options. It comes from a trusted brand, includes clear instructions, provides nourishing ingredients, and offers up to three applications at a very accessible price point.
Q5: What is the difference between a brow lamination kit and a brow styling gel?
A brow lamination kit is a chemical treatment that permanently restructures the hair bonds for weeks at a time. A brow styling gel — like ABH Brow Freeze or NYX Brow Glue — is a daily styling product that holds brows in a lifted position for the day and washes off at night. Styling gels are a great alternative for anyone with sensitive skin or who prefers no chemical commitment.