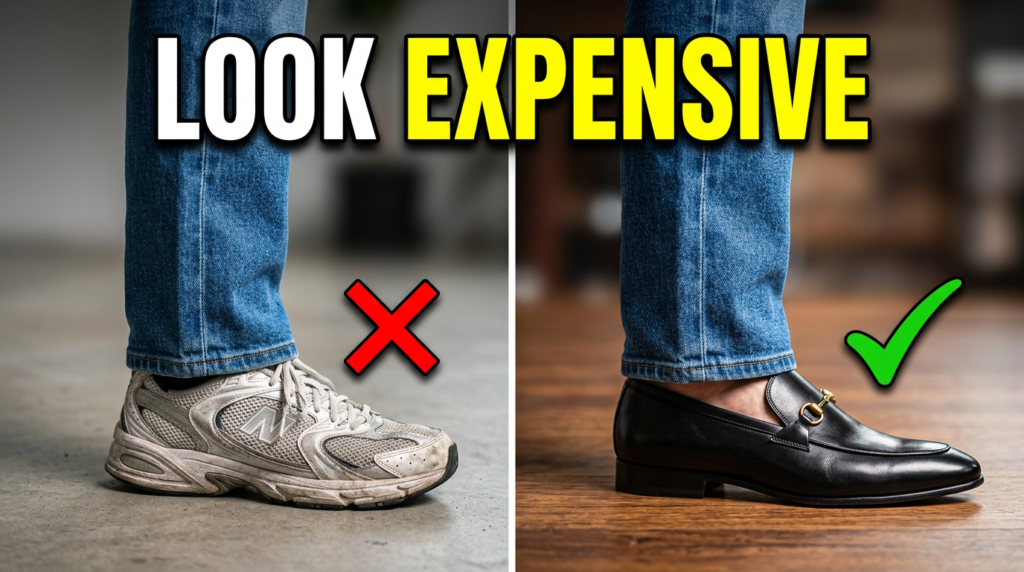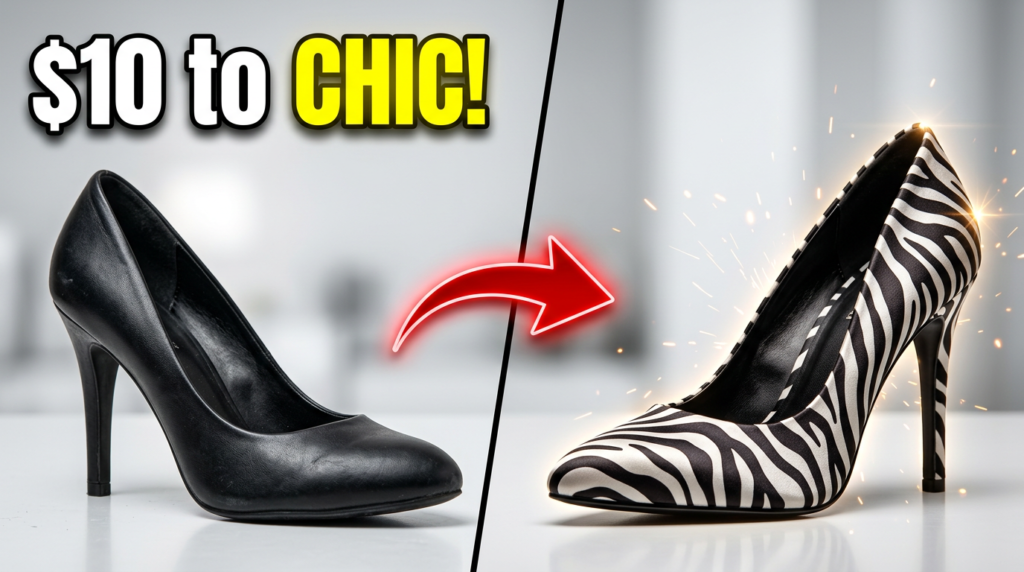
I Gave $10 Heels a Zebra Print Makeover — And They Look Expensive Now
So, there was this pair of $10 heels. Fine. You know the kind — the shoes you grab for one specific event and then they just end up living in the back of your closet forever. But what if they didn’t have to be so forgettable?
Here’s the theory: with a little paint and a whole lot of patience, cheap heels can look expensive. And zebra heels are the perfect proof of that. Not the kind that look like a craft project gone wrong — the kind that look chic, intentional, and like you paid a lot more than you did.
The goal here isn’t just to paint shoes. It’s to create a statement piece. Because that’s what zebra print is. It has this incredible power to look polished, edgy, and glam all at the same time. It’s not just a trend — it’s a whole vibe. And this is how you make that vibe from scratch.
Starting with the Right Shoes: What to Look For
The pair used here is a classic shape — and that’s exactly what you want for a project like this. The silhouette matters. A good shape gives the finished result a finished feeling.
The material, though? It practically screamed, “I cost less than your lunch.” That’s fine. The job is to make the surface look so good that nobody even thinks about what’s underneath.
Prep Is Everything — Don’t Skip This Step
First things first: prep. You cannot — and this is not an exaggeration — just slap paint on a shoe and call it a day. That’s a one-way ticket to a cracked, peeling disaster within two wears.
Start by removing any straps that can be detached. Then comes the most crucial step: cleaning and deglazing.
Cheap heels come with a glossy factory finish, and paint will just slide right off it. Use some acetone on a cotton ball and gently rub down the entire surface. You’ll literally see the shine disappear in real time. That’s exactly what you want — a dull, matte finish that the paint can actually grab onto. Just be careful with the acetone. It’s strong, so open a window and try not to soak the shoe.
Once the surface is prepped, protect the parts you don’t want painted. Use painter’s tape to carefully mask off the sole, the inside lining, and the heel cap. Taking your time here is so worth it. A clean line is one of those small details that separates a professional-looking result from a messy one.
With the shoes prepped and masked, the first real layer of transformation can begin: the base coat.
Building the White Canvas
To get that classic zebra look, you first need a perfect, opaque white canvas.
Angelus leather paint is the go-to here. It’s an acrylic paint made specifically to be flexible and durable on leather and synthetic materials. The key thing is that it won’t crack when the shoe bends — which matters a lot more than most people realise.
The real secret to a good paint job is thin layers. Globbing on one thick coat means it’ll take forever to dry and be way more likely to crack. Use a flat brush to apply a thin, even coat of white paint. It will look streaky and uneven at first. That’s completely normal — don’t panic.
Trust the process. Let that first coat dry completely. A heat gun on a low setting can speed things up, but patience genuinely is your best friend here. Then go in with the second coat.
Three coats is usually what it takes to get that perfectly flawless, opaque white needed for the stripes. Just let each layer dry fully before starting the next one.
Once the white is solid and smooth, the blank slate is ready. It already looks like a huge improvement — but now comes the part that requires a steady hand and a little artistic nerve: the zebra stripes.
How to Paint Zebra Heels That Look Natural, Not Novelty
This is usually the most intimidating part. But there are a few things that make it much more approachable.
The most important thing to remember: real zebra stripes aren’t uniform. They’re organic. They change in thickness, they curve, and they have tiny imperfections. That’s exactly what makes them look natural. So don’t try to paint perfect, geometric lines. That’s what makes DIY zebra look costume-y instead of chic.
Pull up a reference image of an actual zebra before you start. Notice how the stripes curve, how some are thick and others are thin, and how they often form ‘Y’ shapes where they branch apart. As Harper’s Bazaar has covered in its exploration of animal print as a fashion staple, zebra print has always had a place in high fashion precisely because of that organic, untamed quality — and replicating it well means embracing the imperfection.
For the stripes, use the same Angelus paint in black and a very fine-tipped detail brush. The paint consistency needs to be just right — not too thick, or you’ll never get a clean, tapered line.
Start from one edge and sweep the brush toward the middle, letting the line taper off naturally. Then do the same from the other side. The key is being confident with your strokes. Hesitation is what makes lines shaky. If a stripe goes wrong, wipe it away immediately with a damp cloth, or let it dry and paint over it with white. It’s just paint. No pressure.
Vary the pressure on the brush — more pressure for a thicker stripe, less for a tapered end. Let the stripes interact with each other. Sometimes they meet, sometimes they just get close. This is what creates that dynamic, authentic pattern. Avoid anything that starts to look like a grid. Think organised chaos.
This is the longest part of the process. It’s just you, the shoe, and a tiny brush. Put on a podcast, get comfortable, and get into the zone.
Sealing the Finish: The Step That Makes Them Actually Wearable
Once the stripes are done and fully dry, they look amazing — but they aren’t finished yet. Wearing them out at this point would mean the first scuff or drop of rain destroys the whole paint job.
They need to be sealed.
A clear acrylic sealer with a satin finish works best here. Matte or glossy are both valid options, but satin hits that sweet spot — it has a nice sheen without looking too plasticky or artificial. A spray sealer is ideal because it gives an even coat without any brush strokes interfering with the pattern.
Hold the can about 6–8 inches away and spray a light, sweeping mist over the whole shoe. Let that dry for 15–20 minutes, then apply a second coat. Two to three coats of sealer is what makes these truly wearable. It guards against moisture, scuffs, and dirt, locking in all the hard work underneath.
After the final coat, the hardest part begins: waiting. The sealer needs to cure for at least 24 hours before the shoes can be worn.
The Reveal and the Real Test: How to Style Zebra Heels
After the sealer cures, off comes the painter’s tape — and that moment alone is satisfying. Sharp lines. Smooth finish. These don’t feel like painted shoes anymore. They feel like this was the original design.
But the final test is always styling. A statement shoe is only as good as the outfit around it.
The cool thing about zebra print is that it’s basically a neutral — but with a personality. The black and white means it goes with almost anything, but the pattern keeps it from ever being boring.
A monochrome outfit: Straight-leg black jeans and a white top. The shoes become the star. They take a totally basic look and make it a look. They anchor the whole outfit.
A pop of color: A bold red dress. This is where the shoe has to hold its own — and it absolutely does. The zebra print is strong enough that it doesn’t get overpowered by a bright color. It’s energetic, fun, and a little bit daring.
Dressed up: A simple black slip dress. Here, the zebra heels add exactly the right touch of edge. They signal confidence and creativity, and they make the whole outfit feel intentional and modern.
That’s the power of a great shoe. It can completely change the story of an outfit. And as Vogue’s ongoing coverage of animal print in fashion consistently shows, zebra print has never really left the fashion conversation — it just keeps reappearing in new, elevated ways. The fact that these started as a forgotten pair of ten-dollar heels makes that even better.
The Verdict
You can absolutely transform something cheap into something that looks and feels incredibly chic. It just takes patience and the right materials.
These went from disposable fashion to possibly the most unique pair of heels in the wardrobe. They’re a conversation starter. And they prove you don’t need a designer budget to have designer-level style.
A million-dollar attitude on a $10 heel. It just costs a little bit of time and a few bottles of paint.
FAQ Section
Frequently Asked Questions About Zebra Heels and DIY Shoe Painting
Can I really paint cheap heels to look like designer zebra heels? Yes — and the results can genuinely be convincing. The key is proper prep (deglazing the surface), thin coats of flexible acrylic paint, careful brushwork for the stripes, and a good sealer to protect the finish.
What paint should I use for DIY zebra heels? Angelus leather paint is the most recommended option for shoe painting. It’s specifically formulated to stay flexible and crack-resistant on leather and synthetic materials, which is exactly what you need for heels that bend with every step.
How do I make zebra stripes look natural and not cartoonish? Use a reference photo of a real zebra. Real stripes are organic — they vary in thickness, curve naturally, and sometimes form ‘Y’ shapes. Avoid painting straight, uniform lines. Embrace imperfection and varied pressure on the brush for a more authentic result.
How long do painted zebra heels last? With proper prep, quality paint, and two to three coats of acrylic sealer, painted heels can hold up surprisingly well. Avoid soaking them in water and touch up the sealer periodically if you wear them often.
What outfits go with zebra heels? Almost anything. The black-and-white palette makes zebra heels a surprisingly versatile option. They work with monochrome outfits, bold colors like red, and even simple elegant pieces like a black slip dress. They’re a neutral with attitude.
Do I need special tools to DIY zebra heels at home? Not many. You’ll need acetone for prep, painter’s tape for masking, Angelus paint in white and black, a flat brush for base coats, a fine detail brush for stripes, and a spray acrylic sealer. A heat gun can speed up drying but isn’t essential.
Is zebra print still in style? Yes. Zebra print has proven itself a perennial fashion staple rather than a passing trend. It cycles through high fashion and street style regularly and reads as both bold and classic depending on how it’s styled.
Muhammad Awais is the founder of PeakRank Agency LLC, a white-label link building company helping SEO agencies and SaaS brands grow organic traffic through editorial guest posts and contextual link placements. With hands-on experience as a Senior SEO Specialist and Link Builder, he manages a vetted network of 2,000+ quality websites across multiple industries. His focus is on niche-relevant, white-hat link building that delivers real, long-term results.